Friday, May 30, 2014

Featured Friday - Vintage Paper Tags

***** Join our May "Anything Goes" Challenge HERE ***** 


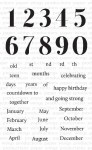
TGIF Paper Wings fans! Dana here today sharing a set of tags that I created with the vintage paper pieces from the May Floral Mixed Media Kit. You can find more information about the May kit, May stamp release and May featured stamp sets HERE. Almost everyone in my family has a birthday this Summer, so I'm planning on using these tags to embellish my wrapped gifts.


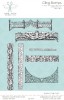
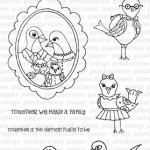
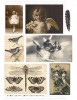
I started with 3x3 inch chipboard squares. After a base coat of gesso and a layer of Gelatos for color, I used the Build A Shrine Clear Stamp Set with Lindy's Stamp Gang Madonna Blue Robe and Jack O Lantern embossing powders to frame each square.


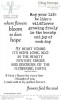
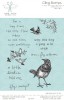
I used the Flowers Quotes Cling Stamp Set for the sentiments on each tag. I finished the tags with some Hand Dyed Ribbon. These tags were super fun to create and they didn't take a lot of time. The colorful vintage images are embossed so these flat tags have a lot of dimension. Try using one of the Journaling Stamps to add a personalized message to the back of the tags.

Thanks so much for stopping by today! If this is your first visit to the blog this week you'll want to catch up on these previous posts:

Katie's Graduation Mini Album
Norma's Mixed Media Layout
Amber's Family Card
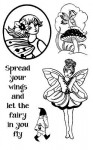
Carrie's Watercolor Fairies Cards and Tags

You have until 11PM CST tonight to join our May Anything Goes Challenge for your chance to win a $20 Credit to the Paper Wings Productions Store!

Wednesday, May 28, 2014

Families Are Forever

*****Join our May Challenge: ANYTHING GOES, HERE*****


Hello everyone! It's Amber here with this weeks Whats Up Wednesday post.
I thought it would be fun to share a fun family themed card today since Memorial Day was just a few days ago. I hope you all had a wonderful weekend with your loved ones. I had a great time with family and friends this weekend. I especially enjoyed the hamburgers, hot dogs, corn on the cob, and delicious watermelon. 


If your stopping by for the first time this week you might want to check out Katie's fabulous Scrapbook Saturday post along with Norma's wonderful Mixed Media post from Monday. Katie shared a delightful little mini album that she created as a graduation gift for here sister. You can check it out HERE. Norma shared a fabulous mixed media layout that she created using the leftovers from several Nesting Components kits. You can check it out HERE. You can also find the current Nesting Component Kit HERE along with a few of the past kits.


This cute little image and sentiment are from the Paper Wings Productions Home Tweet Home Clear Stamp Set. I used the large family portrait image as the main focal point and I add the "Families Are Forever" sentiment to a little die cut tag along with some ribbon to my card front. Thanks for visiting! Don't forget we would love to see what you make with Paper Wings Productions Stamps so add your projects to our Flickr Group,to Pinterest, or leave a comment with a link to your project. You can also check out our Facebook Page and You Tube Page for daily inspiration.
Supplies: Cardstock- White & Tan / Patterned Paper- Elle's Studio / Paper Wings Productions Clear Stamp Set- Home Tweet Home / Staz- On Ink Pad- Jet Black / CTMH Markers / Sizzix Die- Tags / Yellow Ribbon- Offray / Sulky Thread- Black / Sewing Machine 


Monday, May 26, 2014

Come Fly With Me


Hello PWP fans, Norma here with you today!  If you're in the states, I hope you're enjoying your Memorial Day weekend.


Today I'm sharing this mixed media layout using the leftovers of several Nesting Components kits.


I started out by adding a layer of tissue to the kit's backing board.


For even more texture, I embossed the perimeter with the Vintage Lace stamp and Lindy's Cosmic Blue Violet embossing powder. 


I added layers of muslin, patterned paper and a tag created using the Sunburst and Fringe Lace stamps. 


I'm using a 7Gypsies book cover to frame my focal image which I stamped with "come fly with me" from the Bird Melange stamp set.  To embellish, I clustered flowers, ribbon and a butterfly.


More Nesting components bits over a lollipop heart shaped cover.


I've also added a Prima wooden door, vintage lace and some bling.  Thanks so much for joining me today.  Put those stamps to good use and create interesting backgrounds and custom layers for your projects!!  

Enjoy the rest of you week!!


Saturday, May 24, 2014

Scrapbook Saturday

*****Join our May Challenge: ANYTHING GOES, HERE*****

Hey everyone, Katie here today for Scrapbook Saturday! Do you remember the mixed media graduation card I made last week? If not, you can find it here. Well, I also made a mini album to match it and gave it as a gift to my Sister (who was graduating). I used photos I took for her graduation photoshoot.


For the background of all the pages, I started my coloring them each with gold gelato, and then I used the lovely stars from the Hanging Stars stamp set to stamp stars randomly around the pages. When I think of stars, I think of celebrating, so they definitely worked great for the grad photos!

On a few of the pages I also added a few inspiring quotes between the stamped stars, as well as some Queen & Co bling.


If you make something using PWP products, we would love to see it! Post it on our facebook share page and we'll leave you some love!

Thursday, May 22, 2014

Themed Thursday - Easy Iridescent Watercolor Fairies


Carrie here with you today with some quick and easy iridescent watercolor fairy cards and tag.  It looks like we are actually having themed week here at the Aviary with the fairies.  Norma posted an excellent tutorial on Tuesday using more of our fantastic fairy stamps.  Click here to check out her post.  


Hello and Happy Thursday!

All of my projects were made with this watercolor set that we have available in our online store


It is so reasonably priced and easy to use.  It adds such a nice sparkle of color to the stamped image.  You can order one by clicking HERE.  The colors are dry watercolor cakes.  I use them with a small paint brush and a little water.  The more water you use, the more subtle the color will be.  You can even layer color if you feel like it's not dark enough.  Remember, most of the sparkle doesn't show up until it's completely dry so I recommend using it sparingly until you get the hang of it.

My first project is a window card.  I stamped the fairy and colored with only the watercolors.  I stamped and embossed the front panel with one of the stamps from the Sacred Geometry set and added a little more watercolor to the flowers.


On the inside, I stamped and embossed the Tile Pattern stamp and mounted the fairy on top of it.


Next, I made a simple card.  This one has some colored pencil along with the watercolors.


I also added a little bit of the lilac Pearl Pen to the flowers.  I used the same Tile Pattern stamp as the first card, this time without embossing it and a little bit of lace.


I have a little boy, so boy fairies are an important addition to our fairy line.  I made this super simple Happy Birthday tag by stamping the 5 in the background from the Perfect Numbers set.  The green layer features the Sunburst stamp.  The wording also came off of the Perfect Numbers set.  The fairy image was colored only with the watercolors.


I hope you enjoyed our fairy themed week!

Enjoy the flight!
Carrie


Related Posts Plugin for WordPress, Blogger...