Saturday, November 30, 2013

Scrapbook Saturday

Welcome to another Scrapbook Saturday!  Erica here this week to share with you a layout a created the other day with a photo from our very first professional family photo!  This is one of my very favorite photos!  I love how our babies are all behind us and laughing and Michael and I are out front.  It's natural, real and I just love it!  I used a variety of our Paper Wings Productions stamps on my layout and I started with a plain white 12x12 piece of cardstock.  I took two different colors of color shine and added them along one side of my layout.  While it was still wet I took my Circle Background stamp and stamped it into the color shine and then stamped again on the white parts of my layout.  It came out very light but I love the little bits of this background stamp all around my layout.
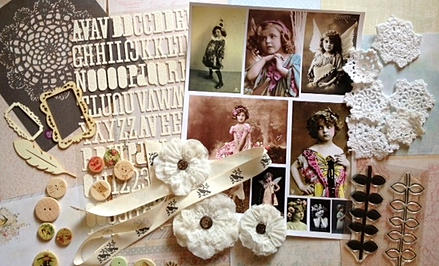
I then began cutting my papers and making my layers behind my photo. Once I had things laid out the way I liked I began to adhere them down with adhesive and my stapler.  I used a piece of the ribbon that comes in the 
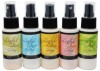
November Nesting Components Kit as a layering piece as well after spaying it with some Cherry Color Shine.  My layout came together very quickly and my favorite part besides the photo is the title!  I am Thankful Everyday for our family and this 
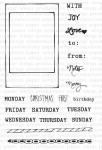
Thankful stamp set is perfect!  I love the font and I think it went well with this glitter sticker from Heidi Swapp!
This stamp is one of my new stamps from Paper Wings Productions and it is already a favorite one at the top of my list!  It stamps out beautifully and can be used in so many different ways!  If you do not yet have this great little stamp head on over to the shop and pick it up HERE!  The last thing I added to this layout was this great wood veneer frame that comes in the November Nesting Components Kit.
I placed it on my photo so that it would frame Michael, the kids, and I so that it would kind of draw you into that one spot which is the most important to me.  Here is a look at my finished layout..

I appreciate you stopping today and please share with us what you have been up to with the Paper Wings Productions products!  We love to see how are fans are using our products!  You can post to our FACEBOOK page, FLICKR GROUP or tag us on INSTAGRAM!  Make sure you join us on December 6th for our Winter Blog Hop and for some more inspiration check out these post from my fellow flight attendants!

Amber-Jolly St.Nick
Katie Smith-Kaite's Christmas Card
Dana-Tea Time

******SALE ALERT*******


We are having a Black Friday sale on our website through Sunday December 1, 2013.  Enter the code BLACK when you check out for 25% off your entire purchase.  Go shop now!


Friday, November 29, 2013

Black Friday

We are having a Black Friday sale on our website through Sunday December 1, 2013.  Enter the code BLACK when you check out for 25% off your entire purchase.  Go shop now!

Thursday, November 28, 2013

Vintage Cutie Cards


Happy Thanksgiving!! Hi!! Cathi here again!! As an American Expat here in Ireland, it is a school and work day, but we always commemorate the day with a little mini Thanksgiving meal!! Hope you are all enjoying a wonderful day!!!

I am here this week with a November Nesting Components Kit themed project, a set of two vintage cards, one of my favorite things to do with the gorgeous vintage images and papers we get in the kits!!


The November kit has tons of Prima Delight goodies! A 6x6 pad, buttons, some wood pieces...and gorgeous Prima doilies and flowers. I just had to use them and the adorable Vintage Cuties Clip Art Sheet images to make my project this week!! The stamp set included this month is the Leaf Border Clear Stamp Set, I used both stamps included for my cards, the solid one makes a fun pattern around my vintage girl in pink in the first card, and I repeated the open leaf border as a pattern for my second card. For my first card I layered a big Prima flower and doily and added in two gorgeous Prima Delight buttons. I tied twine around the card like the little girl has a bow around her hair. I used Picked Raspberry Distress Ink for my stamping and my edge inking on this card.


My second card has the open leaf border stamping in Walnut Stain Distress Ink, again using a gorgeous piece of Prima Delight paper. I added a doily, another vintage cutie image a wooden frame and a button for this one. Simple but sweet.


Everything bar the twine came from the November Nesting Components Kit and I still have so much left from this kit, plus a gorgeous doily mask that I didn't get a chance to use here, look for it on a future layout project!!!

Don't forget to check out the stunning art piece that Norma made with the kit!


Dana made a beautiful layout with the kit:


This amazing kit sold out in record time, but be on the lookout soon for the December kit! Could it be that it is beginning to look a lot like Christmas???? I don't know? Can't wait to find out what beautiful things the December Nesting Component Kit will contain!


Tuesday, November 26, 2013

Tutorial Tuesday - Colorful Embossed Party Invitations

Hi Paper Wings fans! Dana here with you today sharing a colorful party invitation set. With the holiday season fast approaching, I've been thinking a lot about dinner parties, new recipes and spending time with family and friends. I also thought it would be fun to make my own fun and funky party invitation set.


I've been missing the lovey ladies from the Women Melange Cling Stamp Set. I selected Diana for my party invites. (Paper Wings offers a fantastic selection of People Stamps if you have something else in mind.) I selected a nice palette of bright embossing powders for a fresh Warhol-esque design.


I started by embossing Diana in four different colors on pieces of white cardstock measuring 3 x 3.5 inches, which is slightly larger than the stamped image.


I then cut each Diana image into four equal pieces and rearranged them to create four colorful portraits.


I mounted each portrait onto a piece of colored cardstock.


I finished the invitation set by adding a chipboard speech bubble, that I stamped rsvp onto with the Holiday Mix It Up Clear Stamp Set, to each card. There is plenty of room for the party details on the back of the card.

If you're looking for some quick and easy festive holiday cards, check out Katie's Washi Tape Card and Erica's Epoxy Embellishments posts.

Thanks so much for stopping by today! We would love to see what you make with Paper Wings Productions Stamps so add your projects to our Flickr Group, our Facebook page or leave a comment here with a link to your project. You can also find Paper Wings Productions on PinterestTwitter and YouTube!


Sunday, November 24, 2013

Jolly St. Nick


Hello everyone and Happy Sunday! It's Amber here with this weeks Spotlight Sunday Post. I hope you’ve had a fun and relaxing weekend so far!  I love this time of the year, it's such a great time to get creative and there is so much inspiration to be found!


Today I used Paper Wings Productions Jolly St. Nick Cling Stamp Set and Paper Wings Productions Snapshot Framer Clear Stamp Set. Isn't he cute! I love his Jolly face and all the adorable children's toys he is holding in his hand!


If your stopping by the blog for the first time this week you might want to scroll down and check out Norma's fabulous Christmas themed project HERE and Katie's Wonderful Christmas card HERE. Thanks for visiting today and don't forget we would love to see what you make with Paper Wings Productions Stamps so add your projects to our Flickr Group, to Pinterest, or leave a comment with a link to your project.
Supplies: Cardstock- Cream, Green, Barn Red / Patterned Paper- Daisy D's / Paper Wings Productions Cling Stamp- Jolly St. Nick / Paper Wings Productions Clear Stamp Set- Snapshot Framer / Versa Color Ink Pad- Brown / Barn Red Ribbon- Jo-Ann Craft Essentials / Sulky Thread- Green


Friday, November 22, 2013

Rejoice

Happy Friday, Norma here with you today!!


Katie's beautiful Christmas card really got me into the holiday spirit.  So today I'm sharing a Christmas themed project featuring the beautiful Nov Nesting Components kit and a large variety of PWP stamps.


This is a wooden plaque that I picked up at Marshalls on clearance for .99.  


I love searching for good deals on things that I can alter :D


Okay so I started out by flipping through the 6x6 Prima paper pad in the Nov kit and pulled out several pages to work with.


I cut them into pieces and glued them on using Modge Podge.  Next I used the beautiful Finnabair doily stencil in the kit with some gesso.


All of the papers were beautiful all on their own but I wanted to add a little something, something so I pulled out my PWP stamps.  I used the Sacred Geometry and Wise Man stamp sets with blue ink for a subtle touch.


After that, I created vines using the Leaf border and Text Melange stamp sets.


I dyed the Prima flowers from the kit using Lindy's Stamp Gang spray ink.  I embellished the flowers with one of the Prima buttons then tucked in the crocheted dollies and ribbon.


The clip art sheet in this month's kit has so many sweet images to choose from but I knew right away that this was the one.  I fussy cut her and inked all of the edges.  The sentiment and wise men are both in the Wise Man stamp set.  It reads: out of the silence music, out of the darkness light, out of uncertainty promise, hope was born that night.  Isn't that beautiful?!  If you don't have this stamp set, you need to get it!


I added a stitched canvas heart and REJOICE using the Prima letters included in the kit.  I used Lindy's spay inks to dye the canvas letters.


Oh I forgot to mention that I used the packaging from the stencil for my background layer.  The cute wooden frame is also included in the kit.  

This gorgeous kit sold out really quick!!  I hope you got one and will share what you make with us!!!

Thank you so much for joining today and have a beautiful day :D


Wednesday, November 20, 2013

What's Up Wednesday: Katie's Christmas Card


Hi everyone! Katie here sharing a cute Christmas card and a fun way to use washi tape in your stamping! I'm excited for Christmas, not only am I making cards to send out to friends and family but I'm also donating cards to charity so I'm making a lot of Christmas cards this year.

I wanted to show you guys how I used washi tape to color my stamped designs on this card. For my card I used both the Build a Scene stamp set and the Snapshot Framer stamp set.


1. Stamp your design onto white cardstock. White works best since you're layering patterned tape over it. I used the festive trees from the Build a Scene stamp set.

2. Place a strip of washi tape across your stamped design.


3. Repeat until you've covered your stamped design. You could use all the same color of washi tape, but I really liked the mix-matched look of using multiple patterns.


4. Take your craft knife and lightly cut around the inside of your stamped design. Washi tape is very thin so you don't have to apply much pressure to cut through it which is good because you don't want to cut through your paper.


5. After you have your gone around your design with the knife, peel away the washi tape from the outside.


6. Now you have easily colored your stamped designs with washi tape! I love this technique, It's a great use for the popular washi tape! I personally have a whole basket full of different patterned tapes and I love finding new ways to use them.


The PWP design team has posted some really awesome projects lately that I definitely recommend checking out-
Dana made a wonderful project using the November Nesting Components Kit.
Erica has a fun Tool Technique video!

If you make a project with Paper Wings Productions stamps please share it! You can link your projects to the Facebook page, the flickr group, or comment a link to your projects on this post! You can see all the Paper Wings Productions Rubber Cling Stamps here.


Related Posts Plugin for WordPress, Blogger...