Wednesday, January 30, 2013

What's Up Wednesday: Guy Friendly Valentine's

Happy Wednesday!

It's Shay here. Are you like me and totally amazed by what the design team are making?  Make sure to let them know by commenting because they love to read your comments.  Don't forget that this Friday is February's Blog Hop where leaving a little love could mean you win something lovely for yourself!

Speaking of love, today I have a bit of inspiration for putting a little masculine twist on those Valentine's cards for the special guy in your life.

With the Bird Lyrics stamp set (or Be Your Bird stamp and Home stamp) I made two cards:


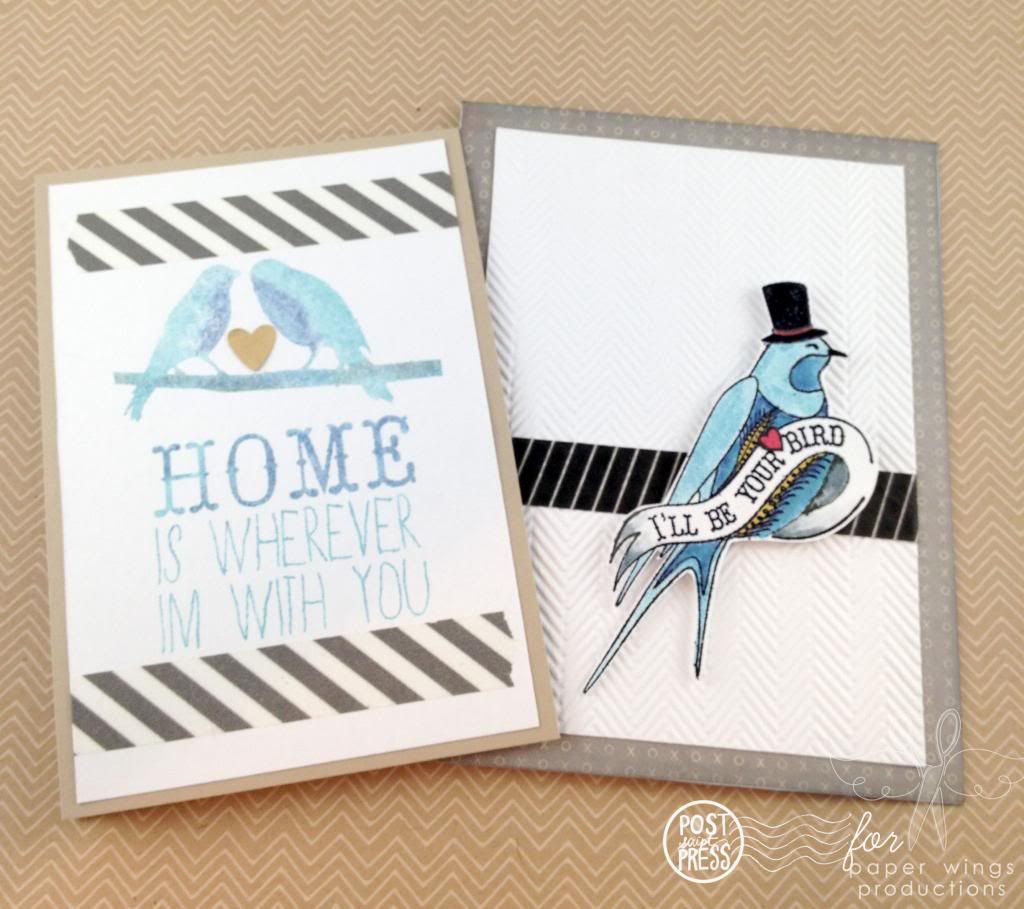
Using similar colors and products making two cards is nearly as easy as making one.

Card No. 1


I began with the Be Your Bird image.  Using Versamark I embossed the bird using black embossing powder.  I colored in the image using Tim Holtz Distress Markers (tumbled glass, stormy sky, weathered wood, picket fence, scattered straw and fired brick).  These markers blend well together and I love the look they have when you color in an image.


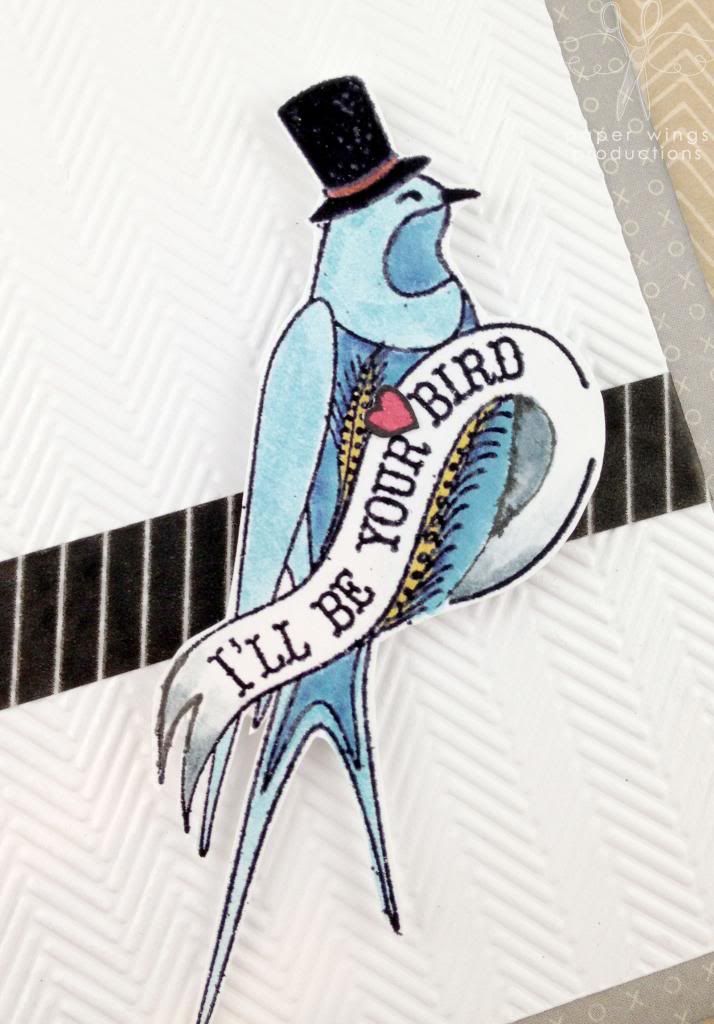
I cut out the image and adhered it using dimensional adhesive to an embossed white panel that is decorated with a little diagonal striped washi.  I think washi is an excellent alternative for ribbon for masculine cards.

I also added a stamped heart from the Handmade stamp set which I cut out and outlined with a black pen to the bird.


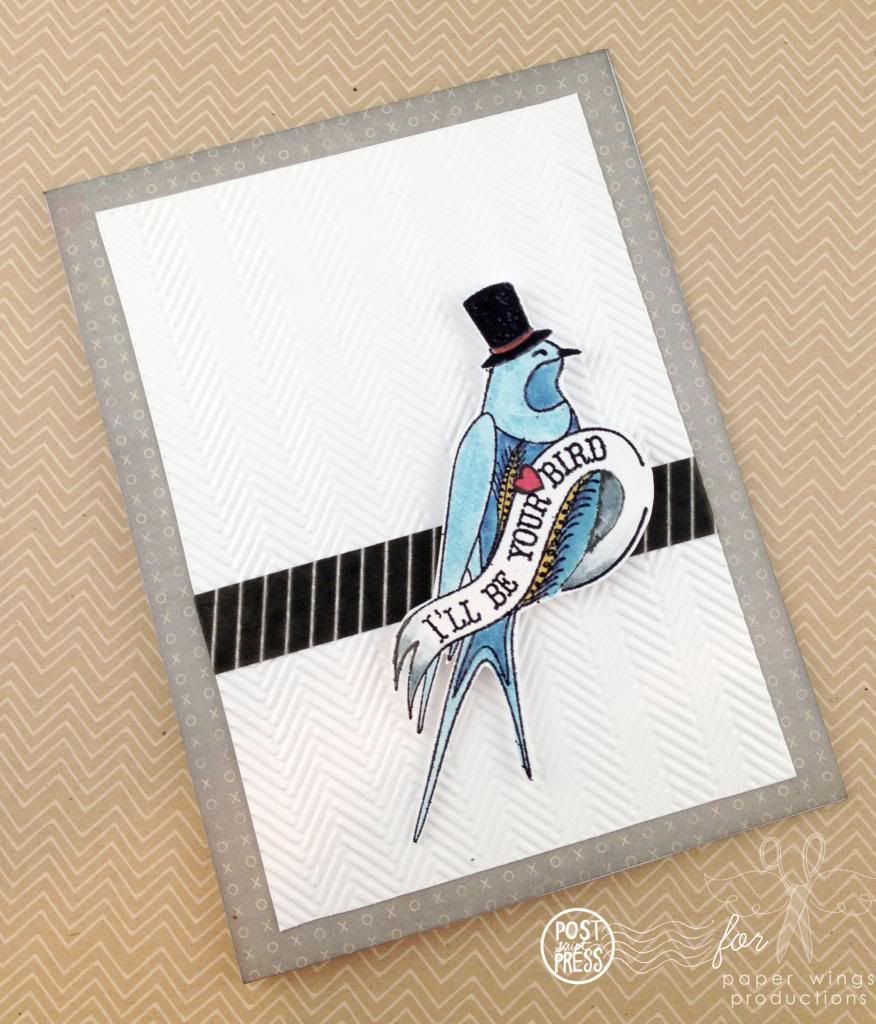
Lastly, I adhered it all to a card base with a subtle Valentine theme and distressed the edges using my ink blending tool and black ink.
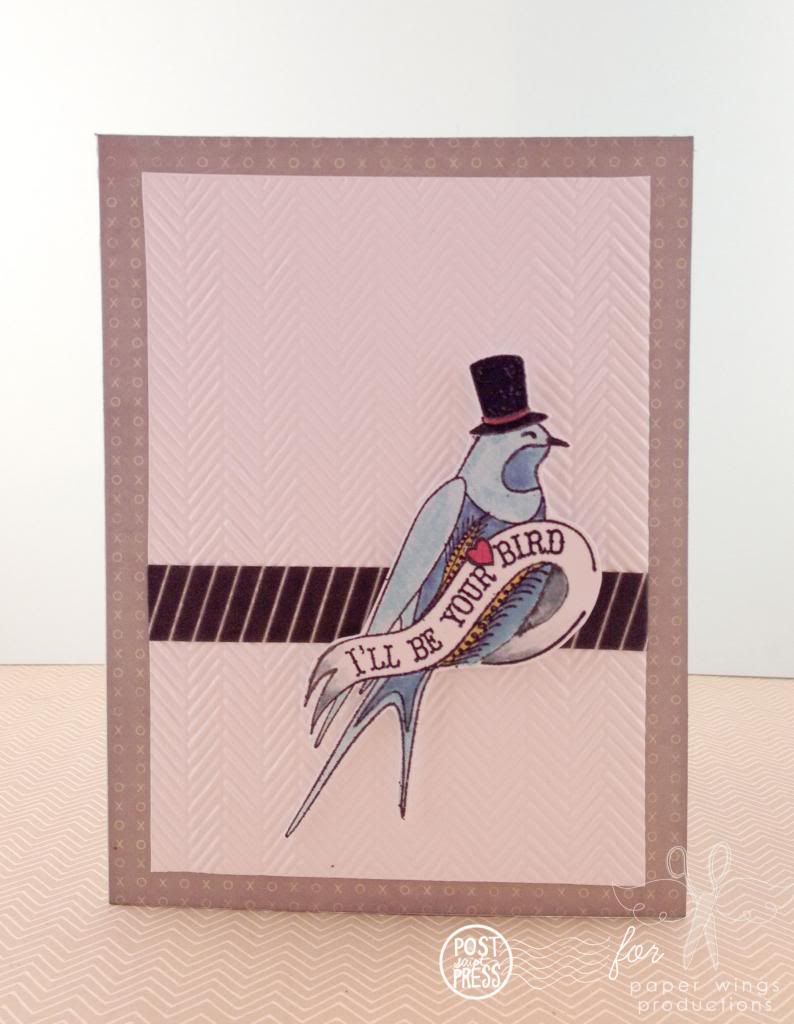
Card No. 2


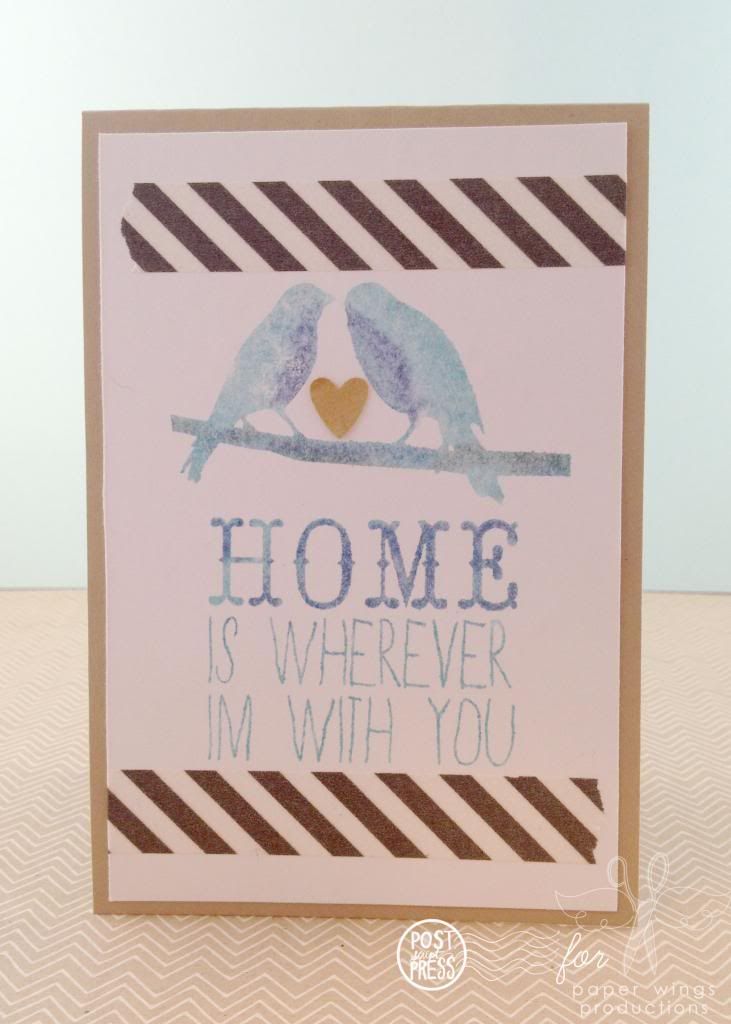
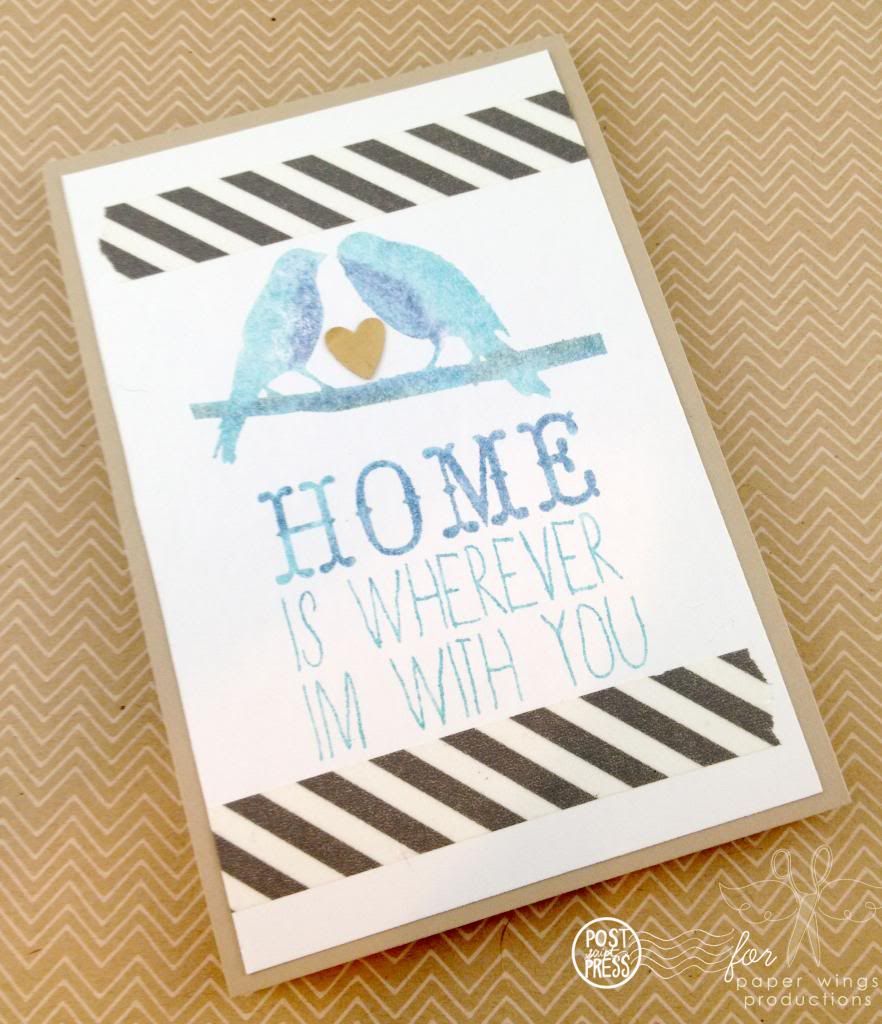
For my next card I also used Distress Markers (tumbled glass, stormy sky and weathered wood), but this time I colored in the image directly on the stamp using the markers.  I lightly sprayed the image with water before I stamped it onto a piece of white cardstock.


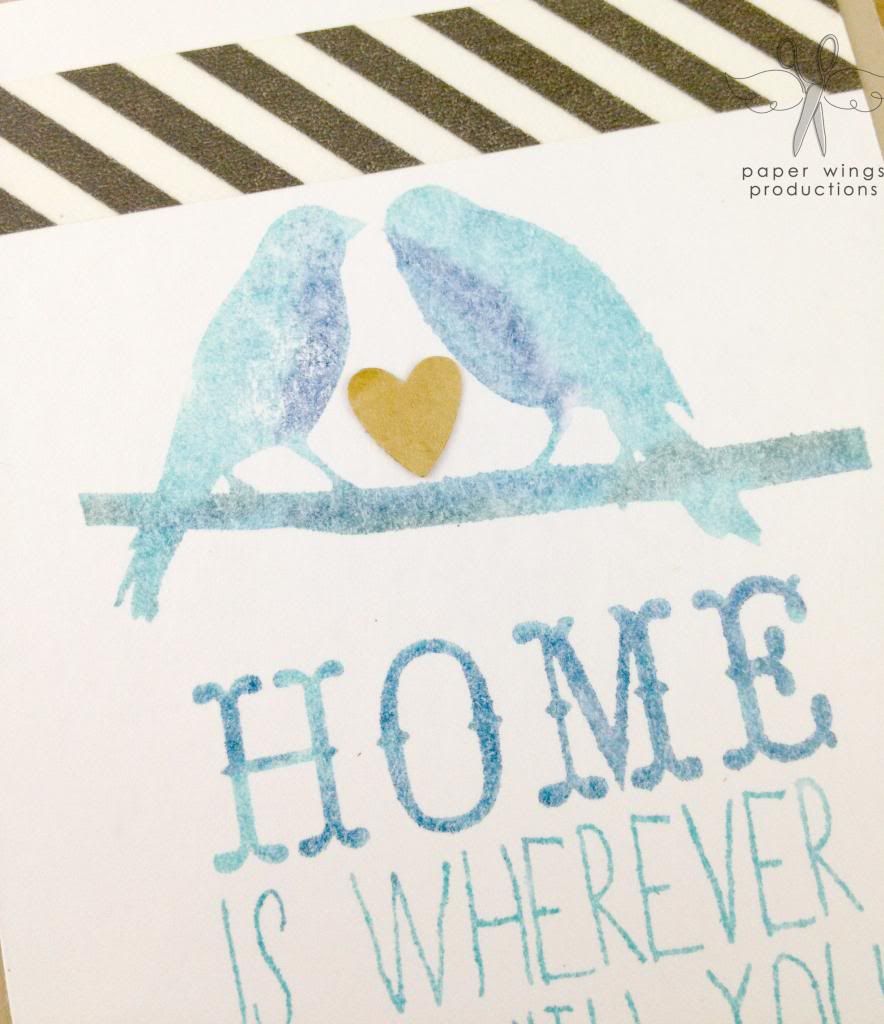
Next I added a diagonal striped grey washi below and above the image.  To add to the Valentine's theme I added a small heart that I punched out of a coffee stained manila tag.  I then adhered the white panel to a kraft card base.


And there you have it--two simple, clean and guy-friendly Valentine's cards.

I hope you ink up some Paper Wings Productions stamps and create some Valentine's cards for the guys and gals in your life!  We would love to see what you make with Paper Wings Productions stamps.  Add your projects to Facebook, our flickr group, to Pinterest, comment with a link on this post or even email pictures to us!

And don't forget to mark your calendars for Friday's Blog Hop (and don't forget there is also a giveaway).  I am really excited to see what the talented gals have in store for us all!

Take flight, Shay.

Stamps used:


Other supplies:

Cardstock: white, Georgia Pacific; desert storm, Neenah Papers
Ink: versamark, Tsukineko; cough syrup, Jenni Bowlin for Ranger
Patterned Paper: Fourteen 6x6 paper pad, Crate Paper
Other: detail black embossing powder, JudiKins; washi tape, Freckled Fawn (I think); Tim Holtz Distress Markers, Ranger Ink; heart punch, Stampin' Up!; black pen, American Crafts; dimensional adhesive, American Crafts; embossing folder, Cuttlebug

Monday, January 28, 2013

2 Tags


Hello Everyone! Hope you had a wonderful time with your friends and family over the weekend. Now that Christmas is behind us, Valentine's Day will be here before you know it. I planned on sharing a Valentine's Day themed project today but I thought I would save it for next month and change it up and share these two tags.


This is not really a traditional mixed media project but I thought it would be fun to share something different this week. I started with two large tags and then pulled out my Daisy White Ink and Lime Ink to stamp my backgrounds. For the blue tag I used the Earth & Sky cling stamp set and stamped the clouds in a random pattern, the Lime Green tag I  wanted to be a little different so I used the Text Background cling stamp set and stamped the text with a matching ink. While both of the backgrounds were drying off to the side I punched two large circles out of white card stock and stamped my sentiments with matching ink. After I had my sentiments stamped I randomly folded some matching tissue paper and adhered it to the back of my sentiment circles. Then  I added the white sentiment circles with the tissue paper to the center of my tags,trimmed the left and right sides, added my two cardstock brackets and stitched around the edges. After all that I added the little star buttons to the blue tag to added a little dimension to the tag and added my ribbon with a staple.

We would love to see what you make with Paper Wings Productions Stamps so add your projects to our Flickr Group, to Pinterest, or leave a comment with a link to your project. Thanks for visiting today!
Supplies: Cardstock- White, Blue, Light Blue, Lime Green / Tissue Paper- White & Lime Green / Paper Wings Productions Cling Stamps- Earth & Sky & Text / CTMH Ink Pad- Daisy White / Versa Color Ink Pad- Baby Blue & Lime / Micro Mini Baby Blue Star Buttons- Dress It Up / Ribbon- Cosmo Cricket & Other /  Sulky Thread- Lime Green & Light Blue / Staple Gun


Friday, January 25, 2013

Jan Mixed Media Kit Inspiration

Happy Friday My Bloggie Peeps!! 

I just wanted to pop in really quickly and THANK everyone who has purchased the January Mix Media Kit.  We are almost sold out so if you haven't ordered one yet you still have a chance to pick one up but don't wait too long because you might miss out.  

Here are just a few examples of what you can do with the kit to help spark your creativity!!

Carrie decorated the cover of her Dylusions Art Journal with gesso, stamps and some of the Cosmo Cricket Art Angels chipboard pieces.

I used the craft tag, Signo pen, Cosmo Cricket Element Deck & Stickers with the mini wings stamps to create this tag.

Next I started working in the Dylusions Art Journal using the stencils, stickers, chipboard pieces, Signo pen and the tag I created.

I hope we've inspired you to get creative with your kit.  Just remember, there is no right or wrong way to use the kit.   It's all up to you :D 

JUST DO WHAT MAKES YOU HAPPY 
ALWAYS LET YOUR CREATIVITY TAKE FLIGHT!!

Have a Wonderful Weekend!!!

Feature Friday - I spy...

Happy Friday!

Just a quick post today to do a little "I spy".  I found a couple of people using Paper Wings Productions products.

First up is our very own Norma.  She made this precious tag using pieces from our January Mixed Media Kit.  We only have a VERY FEW kits left.  Hurry up and get yours before it's too late!  Visit Norma's blog to see the entire post.  She also made an amazing art journal page using the kit.  Check it out here.


Next up is the very talented Lisa, over at A Mermaids Crafts.  Lisa was one of the winners of our Pin It to Win It contest.   Here's a project she made using the set she won.  Isn't it gorgeous??  Hop on over to Lisa's blog to see all the other beautiful things she makes.


Do you make anything with our products?  We would LOVE to see! 

Have a great weekend!
Carrie

Thursday, January 24, 2013

New Year, New You....


Hi everyone, Tara C. here with another Themed Thursday!  A new year is always a time for change and improvement of ourselves, our goals, our hopes and wishes. What better way to celebrate those changes than with this beautiful stamp from Paper Wings Productions!  


Butterflies and moths go through metamorphosis to show their real beauty and we, as humans, are so lucky in that we can go through changes many times over. While I do make some resolutions, I more often like to give myself inspiration throughout the year and this sentiment will remind me daily of what I want the coming year to bring.


I stamped this gorgeous panel in Tuxedo Black Memento Ink and then colored it with Copic Markers.  I layered it and the sentiment with soft Spring colors and with some black for a bit of boldness.  I stamped the small moth from the set in coordinating colors, cut them out and glittered them up with Stickles and finally added a flourish and flower for elegance.


I have an inspiration board above my desk and this handcrafted memento will hang there to encourage me to take advantage of the beauty and hope that each new year brings.  What inspires you throughout the year? Paper Wings Productions would love to see your handcrafted inspirations added to our Flickr group,to Pinterest or to our Facebook page.  Thanks for checking us out today!


Tuesday, January 22, 2013

Tutorial Tuesday - Stamp Kissing

Hi!  I hope you are all having a terrific Tuesday! Dana here today sharing a fun technique called stamp kissing, which is a great way to add some personal flair to stamped images. I used this technique in two different ways, to remove a pattern on a textured stamp and to add a pattern to a solid stamp, on a masculine card I created for my husband.


I started with the Howlin' For You Cling Stamp. The first thing I thought of when I saw these trees was that a set of initials in one of the tree trunks would be a great way to personalize this stamp.


I began by applying ink to the textured tree stamp.


I found a solid heart shape that fit inside the largest tree perfectly in the Handmade Clear Stamp Set. I carefully pressed the solid heart portion of the stamp onto the inked tree trunk to remove a heart-shaped area of ink. 


I didn't use a stamp block for this step. The clear stamps are flexible, so I was able to press just the desired heart portion of this stamp onto the tree to remove some of the ink. Note: Avoid sliding the stamp around during this step to prevent smudging of the image. Any ink that was not removed from the textured stamp can be removed with a Q-tip.

Once I stamped the trees onto my card, I was ready to alter the wolf.


The Holiday Mix It Up Clear Stamp Set contains a feather which I thought could add some fantastic "fur" to my wolf. I repeatedly inked and stamped my feather onto the solid wolf stamp until it was covered, and then stamped the image onto my card.


I'm really pleased with the twist I put on this stamp set and I hope I have inspired you to try this technique! 

We would love to see what you make with Paper Wings Productions Stamps so please post your projects to our Flickr Group, to Pinterest, to our facebook page or leave a comment here with a link to your project. 

Thanks for visiting today! Stop by again this week for Themed Thursday with Tara.


Supplies: Cardstock: GCD Studios, Making Memories; Stamps: Paper Wings Productions; Ink: Ranger; Marker: Sharpie

Friday, January 18, 2013

Feature Friday- I have a dream...

Hi everyone!  Tara C. here with another edition of Paper Wings Feature Friday.  As most of you know, Martin Luther King, Jr. is having a celebration of his birthday on Monday, January 21.  His actual birthday is January 15 and in honor of this great man I thought I would do a very small tribute to one of his most enduring speeches - 'I Have A Dream'


We all have dreams; the actual sleeping, REM kind of dreams and the hope and desire dreams of our future. This is a small dream journal that I created and it could be used to record either kind of dream, musings or a bit of all.


I started out with a small booklet from 7 Gypsies and painted the chipboard covers with acrylic paint in a soothing turquoise to coordinate with the Basic Grey 'What's Up' and 'Out of Print' paper that I used.  The front of the journal is highlighted with this sweet sentiment from the PWP 'Earth and Sky' stamp set and then accented with lots of stamps from 'Kind Words', 'Details Framer', 'Earth and Sky' and 'Butterfly Panel'.  I added in some colorful gems, a metal accent and the ribbon used is actually from a recent PWP order I received in the mail!


The inside of the cover is also stamped with images from the same sets and I also used the 'Double Dot Border'.  The frame outline would be perfect to write: This Journal belongs to....


Next are some of the pages of the book that are just the right size to write down the most pressing thoughts of the day.  Each has been decorated with all of the same stamps and I added a small tag on each page stamped with a sweet little saying from the very dapper 'Marcel' collection


I hope you enjoyed this dream journal and that it inspires you to create your very own.  We would love to see what you make with Paper Wings Productions stamps!  Add your creations to our Flickr group, to Pinterest, or leave a comment with a link to your project.  Thanks for checking us out today.  Have a great weekend and enjoy your MLK, Jr. Day!


Related Posts Plugin for WordPress, Blogger...