Friday, November 30, 2012

Where you can find us this weekend

Happy Friday Peeps-
This weekend Paper Wings Productions will be at two places at once!!
First, we are hosting a FREE all day event at Stamp Antonio.  

Holiday Stamp Extravaganza
with Paper Wings Productions
11 - 4
Join us for a holiday stamp extravaganza. There will be several FREE make & take projects, drawings for free stamps and holiday goodies.  
Come for inspiration, ideas, or just for fun!

Our very good friends Liz Allen, Norma Gomez, Beth Patterson will be there along with me offering 4 different FREE make & take projects!


Here's a pic of the ornament that Norma G will be making:


The other event that you can find Paper Wings Productions stamps at is the Garage of Goods Holiday Show.  We will have a sampling of our stamps as well as some of my handmade books and jewelry.  This show is here in San Antonio at the Lions Field Park at Broadway and Mulberry.  Super close to the Historic Pearl Brewery where they will be having the Tamale Festival.  If you are in the area, we hope you will stop by!


If you are anywhere near San Antonio I hope you will join us at one of these events tomorrow!

Enjoy the flight,
Carrie

Wednesday, November 28, 2012

What's Up Wednesday: Golden Christmas


Hello peeps!

It's Shay here.  I hope everyone had a wonderful Thanksgiving.  Before I get onto today's post I wanted to draw your attention to Julie's series of Advent Calendar tags: Part 1, Part 2, & Part 3.  They are each unique and delightful.

Now that December is nearing it is a perfect time to get those Christmas and holiday cards done.

I think gold is perfect for the holidays so I pulled out my gold embossing powder, some older Paper Wings Productions stamps along with newer stamps to create a couple Christmas cards.  I really love how I was able to incorporate the older non-Christmas themed stamps with newer Christmas themed stamps to create very Christmasy cards.


For the first card I wanted to use the Madonna and baby Jesus image from Melange Women 2-Worldly Women set.  After gold embossing the Madonna, I adhered the white cardstock panel to the white cardbase which I adhered a piece of decorative gold tissue paper and wrapped around with twine.  I added a few gold embossed stars from Hanging Stars for added interest around the the Madonna and on the cardbase.   The sentiment is from Christmas Mix It Up which I gold embossed yet again and cut into banner shapes.


The inspiration for this card was the three Magi who are sometimes portrayed as kings.  There are great crown images found in the Royal Melange or Crowns sets.  I chose to use the two larger crowns.  On red cardstock I stamped in red the postcard image (such an awesome background) from Writing Backgrounds or Postcard.  I then embossed each crown with a different embossing powder: silver, gold and copper. The sentiment is the same as the first card from Christmas Mix It Up which I stamped inside the banner from Banner Day--all gold embossed.  The words fit rather well and because they are clear you can bend them slightly to fit the curve of the banner.  I adhered this panel to a gold panel.  The card base is red which I stamped in red using the big bold flourish from Flourish Fun 1 and the trio of dots from Flourish Fun 2.  All of the red layers are distressed using the red ink and my ink blending tool.

I hope you ink up some Paper Wings Productions stamps and create festive holiday cards.  We would love to see what you make with Paper Wings Productions stamps.  Add your projects to our flickr group, to Pinterest, comment with a link on this post or even email pictures to us!

Take flight,
Shay.

Supplies:

Golden Mother and Child
Stamps: Melange Women 2-Worldly Women, Hanging Stars, Christmas Mix It Up
Ink: Versamark by Tsukineko
Cardstock: Georgia Pacific in white
Other: gold embossing powder by Judikins; brown and white twine by Divine Twine; decorative gold tissue paper

Three Kings
Stamps: Royal Melange or CrownsChristmas Mix It Up, Banner Day, Writing Backgrounds or PostcardFlourish Fun 1Flourish Fun 2
Ink: Versamark by Tsukineko; Jenni Bowlin for Ranger in chili powder
Cardstock: gold and red
Other: gold, copper and silver embossing powder by Judikins and Ranger; ink blending tool by Ranger

Monday, November 26, 2012

Cyber Monday

We have some really great Cyber Monday promotions for you!  This offer is valid TODAY ONLY!

Purchases up to $25 will receive 15% off with the code CYBER15


Purchases up to $50 will receive 25% off with the code CYBER-25


Purchases of $51 and more will receive 35% off with the code CYBER35


Go shop!


Friday, November 23, 2012

Small Business Saturday


Greetings peeps,

We hope you had a wonderful Thanksgiving with friends and family.  We are so truly thankful for each and every one of you.  This has been a great first year and we couldn't be where we are today without you!

Are you planning on participating in small business Saturday?  It's a commitment to shop any one of your favorite local, independent stores this Saturday, November 27.

These days there are fewer and fewer scrapbook and rubber stamp stores left.  Between a rocky economy and online retailers that deeply discount merchandise a lot of small business have gone away.  Let's do our part to keep local craft stores open!  Commit to dropping into your local store at least once a month and buy something, even if it's just one thing.  Without local stores, we lose touch with our community of artists.

Our local store, Stamp Antonio, is also celebrating 20 years of being in business.  My family had the pleasure of owning the store for 10 of those years, so this event has significant meaning to me.  If you are in the San Antonio area, I hope you will drop by on Saturday for a day filled with demos, make and takes, door prizes, and a good old trip down memory lane.  I plan on being there for a little while in the afternoon, I hope to see you there.  Our good friend Beth will be doing a free make & take with our stamps.

The rest of the day, I will be vending at the Peace Market.  I am selling some of my hand made books, jewelry, and other goodies.  Our talented designer, Liz Balderas is also vending there.

Again, I hope you will keep small businesses and American made products (like ours!) in mind when doing your holiday shopping.

Blessings to you all,
Carrie

Wednesday, November 21, 2012

What's Up Wednesday - Advent Calendar: Part 3

Hello Peeps!
It's Julie here for the final installment of the Advent Calendar tags I've been sharing with you.  If you didn't get a chance to see the previous tags, click here to check out Part 1 and Part 2. I've had such a good time making these tags and can't wait for December to start using them. 


Ready for the details?  Here we go...


Details:  Using the cute puppy from the Door set, I just had to add a Santa hat from the Christmas Mix It Up set.  I like how it looks like it is too big for him.  The sweet sentiment is from the Holiday Tags set.  Everything is colored in prisma pencil, and I used some liquid applique on the Santa hat to make it look furry. 


Details:  As I was looking through my supplies, I found a few stamps from our previous releases that I used on this tag.  Here is Sophie who comes with a present in her accessories (and a diagonal stripe - perfect for a candy cane border).  I also saw the Snapshot Framer had a Christmas sentiment.  I used it with  the "wishing you a" from the Christmas Mix It Up set.  Sophie's little dress is paper pieced with the same diagonal stripe used on the border strip and this paper is the source of this alternative Christmas color combo.  So cute!


 Details:  This tag started with a paper background and a tree from the Build a Scene set colored with Distress Markers.  I added some Christmas lights from the Holiday Add Ons set and used my white Souffle pen to color the lights for a bright white look.  Little Christmas clear set sentiment was the perfect saying, but wouldn't fit my tag.  My solution? I stamped it and cut the words out so I could place them to fit. Easy!


 Details:   The Build a Scene set makes another appearance here with a bare tree and deer in a peaceful snow setting.  I used the hill side stamp in Tumbled Glass (stamped off first) to create a snow bank.  The tree and the deer are stamped in Versafine Sepia brown and the snow and snowflakes are highlighted with stickles.


 Details:  One of my friends who just adores preparing her house for the holidays is always using "fa la la" as a verb!  She just loves to "fa la la".  One year, I made her a little goody to put on her refrigerator that says fa la la.  She loved it.  This tag is in honor of Vickie.  I used the festive pom pom decorations from the Happy Day set and added the fa la la with the Whimsical Alphabet letters, stamping them in Barn Door red and adding Barn Door stickles for a subtle shimmer.


 Details:  I really love the circle background from the Backgrounds Cling set.  I inked up a large tag with green and walnut distress inks and stamped the background in red.  I also stamped the Holiday Sparkle sentiment in red and dried it really well.  After die cutting the tag into a star, I added a coat of rock candy stickles to give that sugary sparkle ( I really can't get enough of rock candy!!!).


 Details: I was inspired by this layout online, but I altered it a little.  I love the layers of elements.  The papers are Memory Box and Basic Grey (love love love).  The silver glitter ribbon is a tape that I've cut to size. The stamps are from Flourish Fun 1 and Flourish Fun 2, as well as the bells from the Holiday Add Ons set. I stamped it on paper to color the bow, and on silver paper to have silver bells.  Then, they are coated in Glossy Accents to give them a pretty shine.  The sentiment comes from two sets again.  JOY from the Holiday Tags set and Liz Allen's sweet handwriting from the Wise Men set..


 Details: Here is a great  Vintage Santa stamped in Walnut ink with shades of red and green distress ink to color in the image with more walnut ink on the edges.  It's finished off with a quick glittery spray to give it a hint of sparkle.


 Details: And number 25 - the three Wise Men following the star.  I inked the tag in shades of darker blue distress inks and stamped the image in Chipped Sapphire and heat embossed with clear powder to give that intense night sky. The silhouette image of the wise men are colored with distress marker and Diamond Stickles added to the star.  This is mounted on a yellow gold metallic paper from my stash and popped off the background.  I think this one is beautiful in its simplicity. 


Here is one final look at them.  I have chosen a frame gifted to me by my friend Lily to showcase the tags for December.  Since I don't have a tree, I'm really looking forward to this new Christmas decoration in my house.


 I hope you enjoyed this Advent Tag series and found some inspiration for your holiday projects.  I hope you have a Happy Thanksgiving!


Thanks for looking!!

Julie


Friday, November 16, 2012

Feature Friday- Advent Calendar: Part 2

Hello Peeps! 
Welcome back to Part 2 of the Advent Calendar!  Today I"m sharing tag 9-16.  Since I used smaller tags for this project, I felt the smaller numbers from the Perfect Alphabet Clear set would be a better choice, and keep the focus on the image. The number 9 is from the Perfect Number Clear Set and all were stamped with Versa Fine Black Onyx.  Let's take a look at them!!


 I've been inspired by so many ideas on Pinterest, Splitcoast, and Online Card Classes Holiday Workshop.  Here are today's tags!


Details:  This tag features one of our Christmas Sentiments stamps in the background, and one of our border stamps from our Life Framer set. I inked cardstock in yellow, red and green, and then embossed the border stamp in a contrasting color and cut the strips to length for the tree shape.  The star is from our Hanging Stars set, and it is also embossed (Egyptian Gold-Judikens)


Details: Cardstock background (Basic Grey), white Neenah Cardstock with a torn edge added for snow and snowman from Snowman Love set and used the cute little scarf for this little guy.  The Let it Snow was stamped to fit the space and embossed with Stampin' Up Whisper White ep.  Since he was looking upward, I had to give him a little snowflake to watch from the Winter Mix It Up set.  And of course, I couldn't resist a little Rock Candy Distress Stickles to make the snow sparkle.


Details:  I'm a Texas gal!  So, I had to pay a little tribute to Texas!  I used the Lone Star State clear stamp and stamped it on this cute Christmas plaid paper and cut it out. I added the cute Texmas sentiment in Festive Berries distress ink. And finally, a sweet little mistletoe from the Holiday Tags clear set. The woodgrain paper is from Studio Calico.  Perfect!!


Details:  I just love this pine bough and pine cones from the Pines Cling Stamp Set. I added another element from the Holiday Tags clear set to create an ornament.  I drew the hanger and bow with a gold pen.  And, I love this sentiment from the Winter Mix It Up set.


Details:  Basic Grey green paper from Figgy is accented here with Flourish Fun 2 stamp and two more strips of BG Figgy paper.  All edges are inked with Walnut Distress ink, and the Happy Holiday Script sentiment added and embossed in red! Simple and Elegant.


 Details: Here is another stamp from the Pines Cling Stamp Set using the large tree and I used a white pen to add snow to the tree and Frosted Lace stickles.  Although it is faint here, I used the small dot stamp from the Art Textures set to create falling snow stamped with SU! Whisper White craft ink and embossed with clear ep.  It reminds me of a trip I took to Wyoming for my first Christmas in snow.  I'll never forget that.


Details:  This one took a little work, but I love how it turned out.  The tag background is inked with two colors of Distress ink plus a little Walnut.  I've added a strip of paper to separate the two areas and give it some interest.  Then I used the Merry Clear stamp with Christmas in black, and merry stamped in Festive Berries on a separate brown inked tag.  I embossed merry ink clear to give it a little shine, and then trimmed the sentiment to expose the background and have the letters hang off the side. The finishing touch is the holly berries and leaves from Holiday Tags stamped and colored with Distress markers, with a touch of Barn Door distress stickles. It feels classic and delicate.


 DetailsI loved seeing this technique from Jennifer McGuire in the Online Card Classes Holiday Workshop.  First I stamped the sentiment from Snowman Love  and using a mask, I have sectioned off part of the tag and stamped a flourish and several snowflakes in a variety of blues along the edge.  Using an ink blending tool, I shaded the exposed areas of the tag.  And, to add that icy look, a touch of Diamond Stickles.  I love how this one turned out! (Flourish Fun 2 , Holiday Mix It Up, and Winter Mix It Up for the snowflakes).


Lots of festive designs here for part 2 of our Advent Calendar.  There will be one more installment of the remaining tags before the end of the month.  I hope you found something today (or several ideas) that will inspire you for your projects. As always, I'd love to see what you create!  Add your projects to our flickr group, to Pinterest, comment with a link on this post or even email pictures to us! See you soon with the final set of tags. 

"Deck the Halls!!!"
Happy Stamping!

Julie

Wednesday, November 14, 2012

What's Up Wednesday: Thanks is for Giving

Hello there peeps,

It's Shay here to bring you some more autumn inspiration which is a pleasure with all the new autumn stamps.

This season is a great time to thank all those wonderful people in our lives.  For the busy crafter who wants to make simple handmade cards I have some examples.  Using mostly the same products, colors and just two stamps: the single leaf from the Leaf cling stamp set or Leaves cling stamp set and the thanks is for giving sentiment from the Thanks is for Giving cling set you can make cards easily and still alter them to make them each unique.

My cards all began with the single leaf from the Leaf set or Leaves set.  I really love how elegant it is and perfect for any autumn project.  I stamped the leaf three times on a piece of teal patterned paper, cut them out and them edged them with Distress Ink in walnut stain.  I then started shaping the leaf to give them more dimension.

I decided to split the leaves to make two cards.  The first card with a single teal leaf and the second card with two leaves.  The first card has less stamping with only one ink color and is even faster to make, while the second has more stamping (in two ink colors) if you feel like inking up your stamps a bit more.  The first card also has very little embellishment on the leaf other than a little twine bow while on the second card, the leaves are given a much bolder look using Stickles.

Card No. 1 (less stamping)


This particular card relies more on bold patterns from paper and washi tape.  I love these bright, but fall friendly colors.  Nearly everything is edged with Distress Ink in walnut stain as I believe brown is a very welcome neutral during this season.

Card No. 2 (more stamping)


This card relies mostly on a leaf stamped card base with some accents of patterned paper and washi tape.  Again nearly everything is edged with Distress Ink in walnut stain.  For the cut out leaves I outlined them with Distress Stickles in walnut stain.

I hope this inspires you to pull out your Paper Wings Productions stamps and make something to celebrate autumn by giving thanks.  We would love to see what you make with Paper Wings Productions stamps.  Add your projects to our flickr group, to Pinterest, comment with a link on this post or even email pictures to us!


Take flight,
Shay.


Supplies:

Stamps: Leaf or Leaves and Thanks is for Giving
Ink: Tim Holtz Distress Ink by Ranger in walnut stain and peacock feather
Cardstock: Neenah Paper in recycled 100 natural white
Patterned Paper: My Mind's Eye and October Afternoon
Other: Inksentials ink blending tool by Ranger; K & Company die cuts; Distress Stickles by Ranger in walnut stain; Freckled Fawn woodgrain washi tape; hemp twine; dimensional adhesive

Monday, November 12, 2012

Happy Monday!

Happy Monday blog friends!

It's finally turning cool here in south Texas, and I am in a fall-ish kind of mood!  We had a great make & take weekend at Scrapbook N' More in New Braunfels this past weekend.  I was greatly inspired by Shay's fall cards she posted recently and decided to do a make & take based on her idea.  Here are some of the variations that we did.

I really LOVE using the Build A Scene set.  It has limitless possibilities   Everyone's cards came out differently even though we all used the same colors of ink and the same stamp set.  Each card uses Distress Ink Pads colors Wild Honey, Spiced Marmalade, and Bundled Sage.  We inked the background of the card with a blending tool and stamped on top with a Rich Cocoa Memento Ink Pad.


 This card uses the happy fall ya'll sentiment.  We used the small leaf image on the set to add foliage to the tree and on the ground.  That image was stamped in Spiced Marmalade and Dried Marigold.


This card uses a great quote that can is sold individually and on the Nature set.


This one features the Thankful word set and uses the words "so" and "for you" from the Fall Mix it Up set.  Those Mix it Up sets are really wonderful!  All of them feature a variety of sayings and sentiments that you can mix and match to create endless wording options.  

We love going to stores and providing free make & takes!  Do you have a local store that you love?  Let us know!  We are always looking for great independent stores!

One more detail we want to share with you today.  Our good friend Beckah Krahula's new book just came out.  One Zentangle A Day is selling out everywhere!  Congrats to Beckah!

Enjoy the flight!
Carrie

Friday, November 9, 2012

Feature Friday: Season of Thanks

Happy Friday peeps!

It's Shay here.  Have you seen all the recent cool projects by Carrie, Norma and Julie?  You really need to check out past posts.

I have a really easy project for you today.  I was inspired by the beautiful autumn cling stamp sets Carrie designed this release.  You can find the stamps I used in the Acorn Elements and Leaf cling stamp sets.  If you want some additional lovely stamps too you can go with the bigger stamp sets: Leaves and Thanks is for Giving.  


I found a Maya Road mini chipboard album I had for a while now that I loved the shape of and thought I could make a myriad of things from if I traced the shape.  You could also use a punch, die or an electronic die cutting machine to cut out a shape you like.

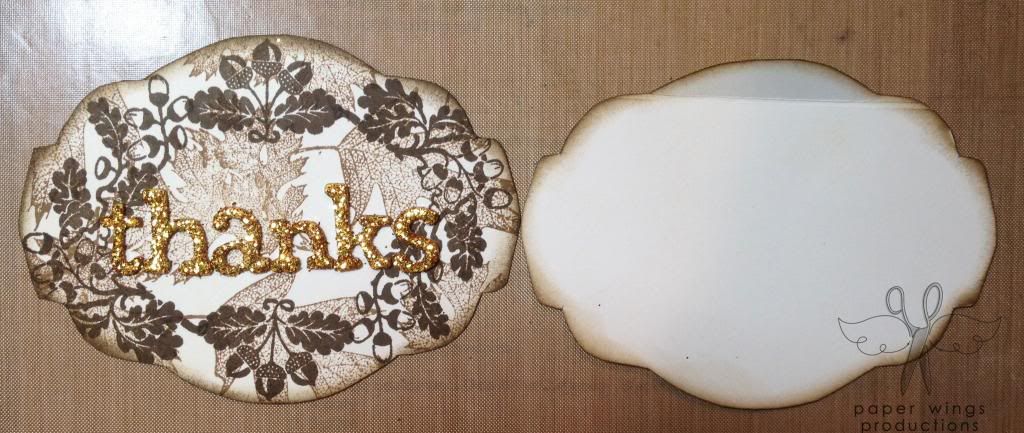
1. With the leaves from Leaf or Leaves stamp sets I stamped them sporadically with Distress Ink in brushed corduroy on a cream piece of cardstock.  


2. I traced the shape on the back side of the stamped piece of cardstock.  I cut out the shapes.  


3. I stamped the pretty acorns with its leaves on the top and bottom of the label with Distress Ink in walnut stain.


4. I stamped the acorn spray on each side with Distress Ink in walnut stain.  This happened to fit just right!


5. I inked all the edges with my ink blending tool and Distress Ink in walnut stain. 

This is where my mind got thinking about what I could do with all these labels.  

Here is what I came up for you today:

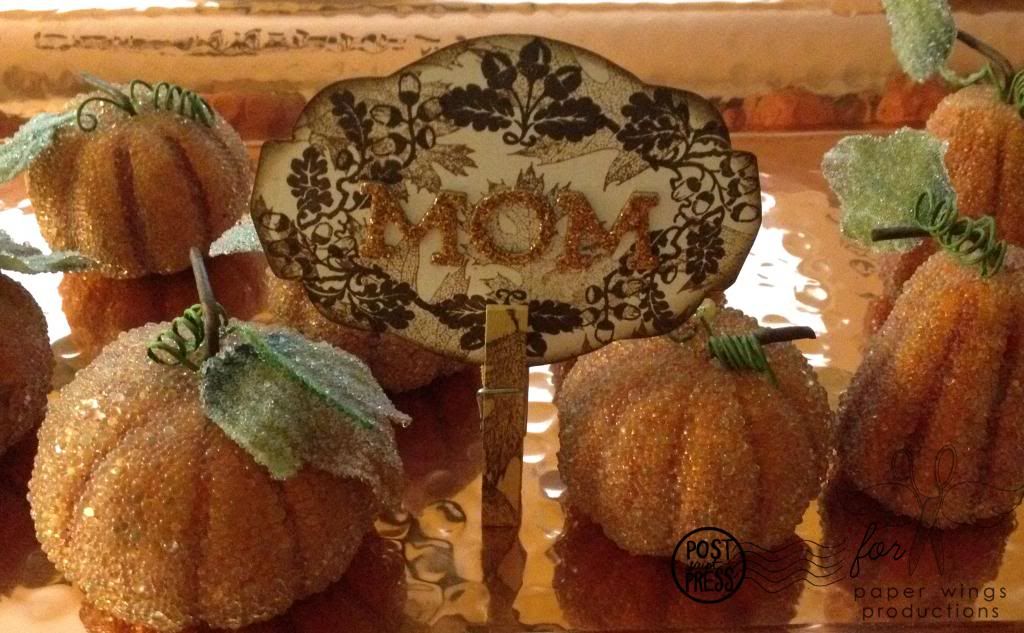
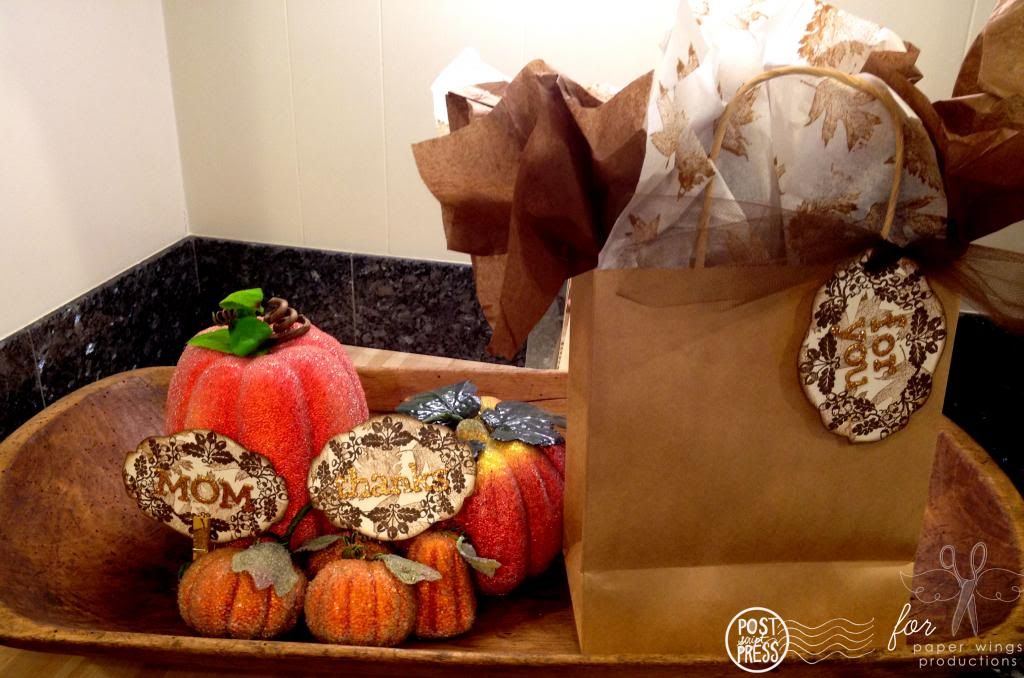
1. Make a place card by adding a person's name in gold Thickers.  You could also stamp the name using some of our alphabets like: Funky Lower Case,  Perfect Alphabet or Whimsical Pattern Alphabet.  You could also type it or handwrite the names as well.  I also used a very inexpensive wood clothespin from the dollar store to make a matching place card holder.  I simply sprayed it with gold mists/sprays and stamped it with the leaves with Distress Ink in brushed corduroy after it was dry.


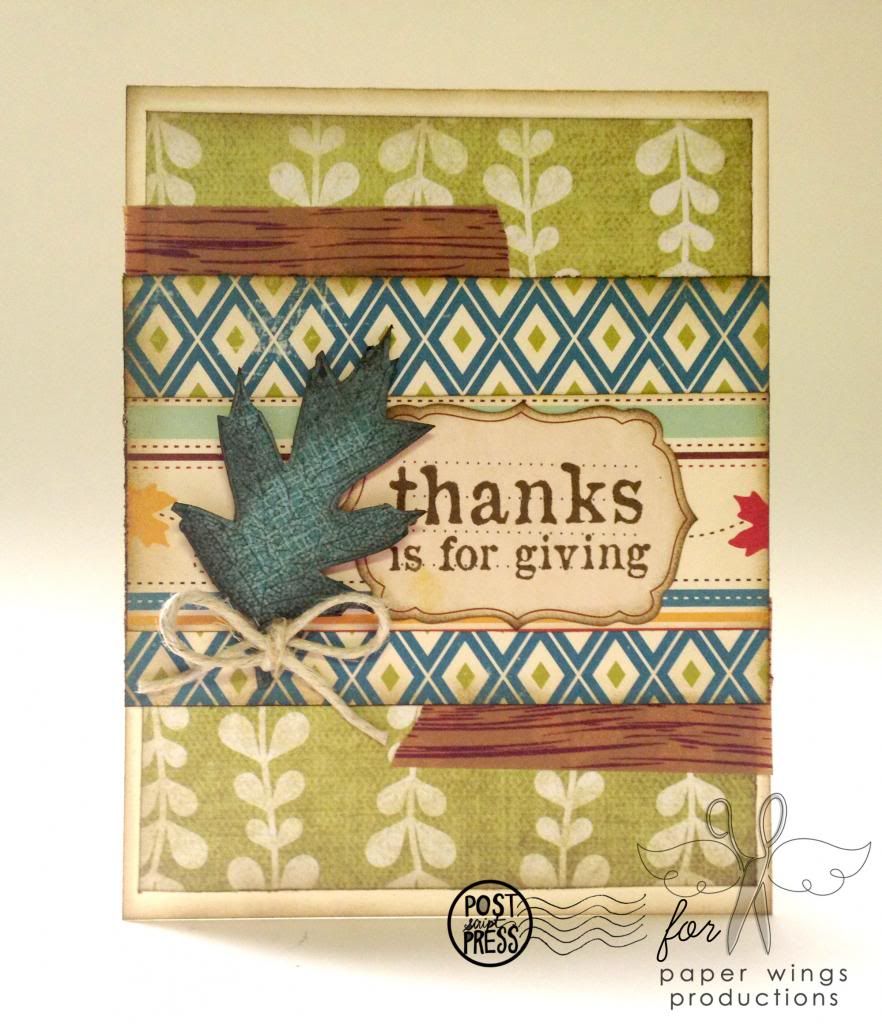
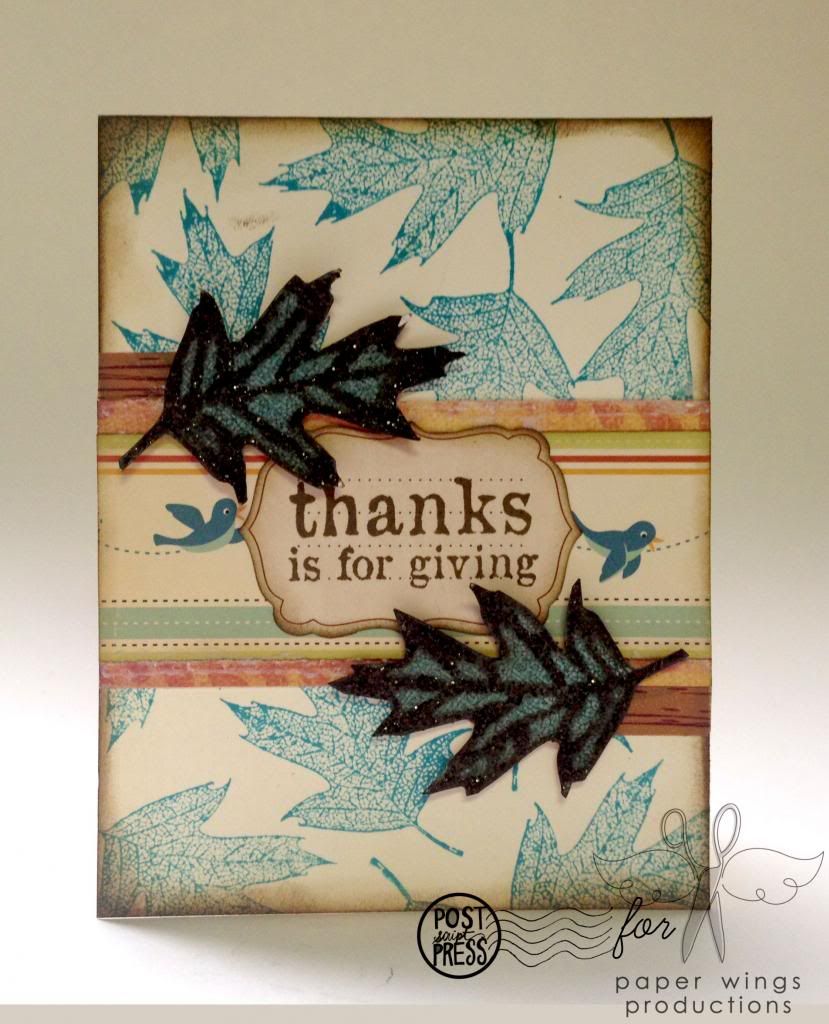
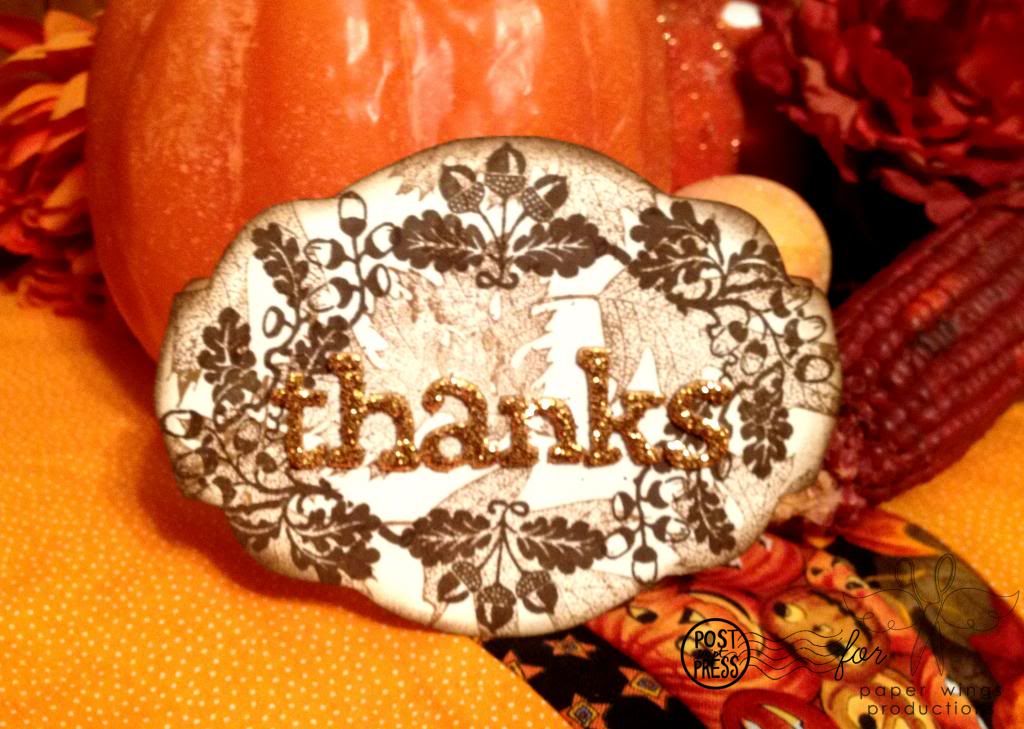
2. Make a little thank you card that is very appropriate for the season. 


I cut another label from plain cream cardstock and scored a line on the top of it to create a hinge.  I inked the edges with Distress Ink in walnut stain.  I then attached the decorated label to the scored label to make a card.  For a uniform look I again used the gold Thickers to spelled out "thanks".  You could also use the Thankful stamp set and it would be beautiful embossed in gold.


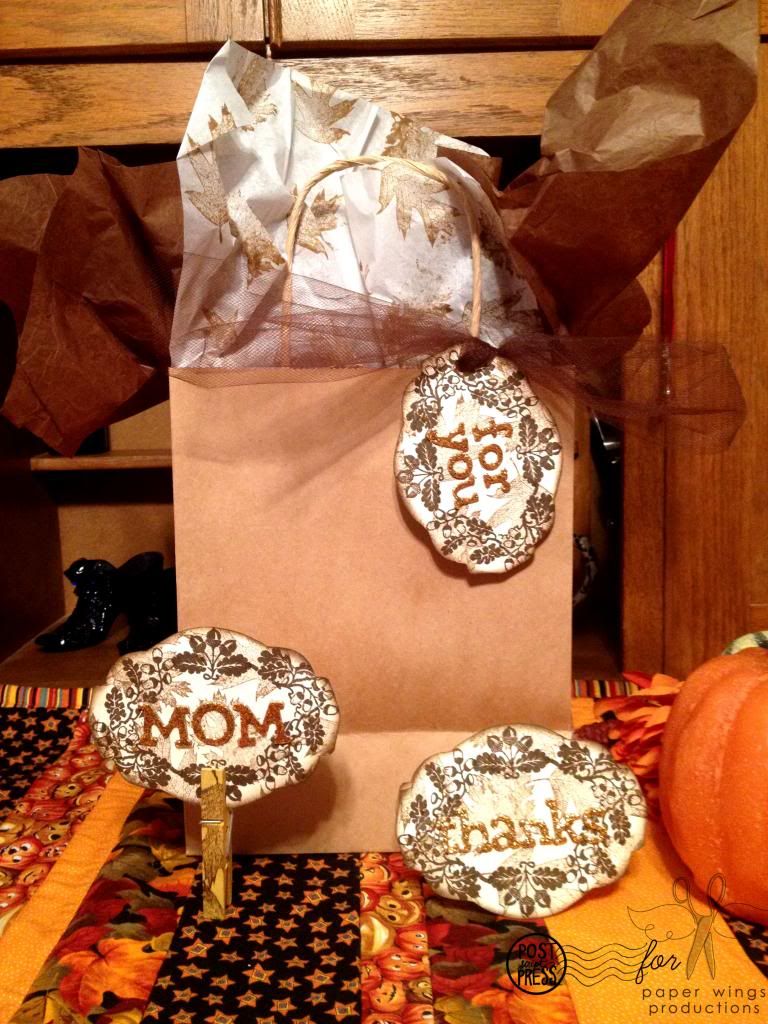
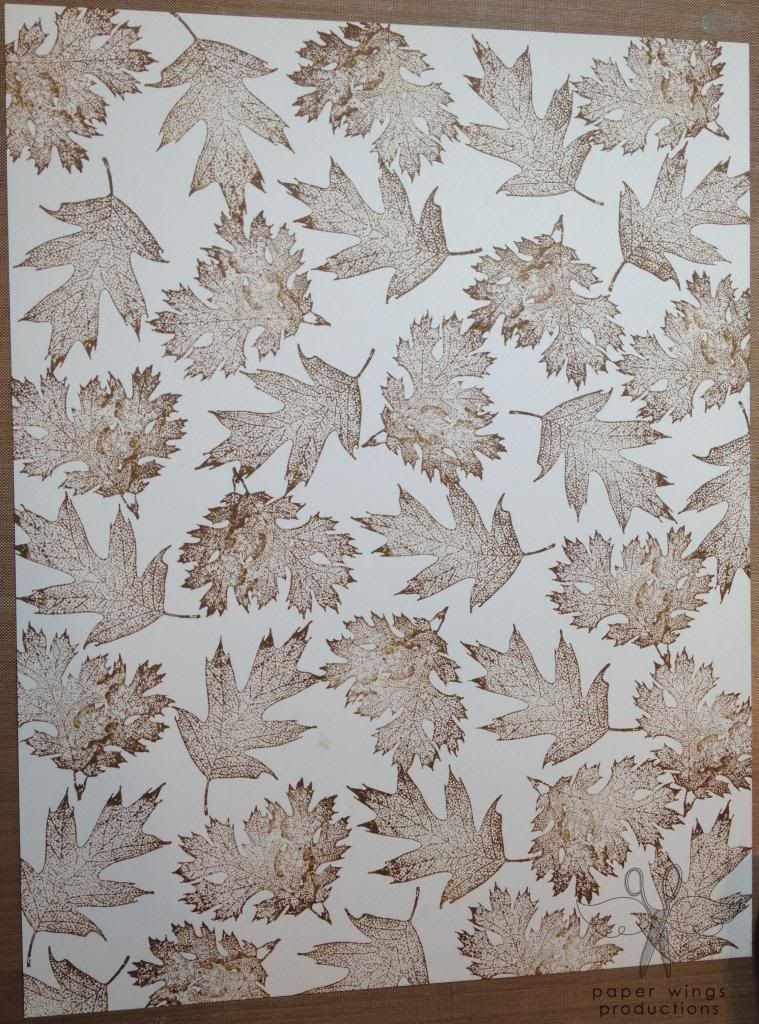
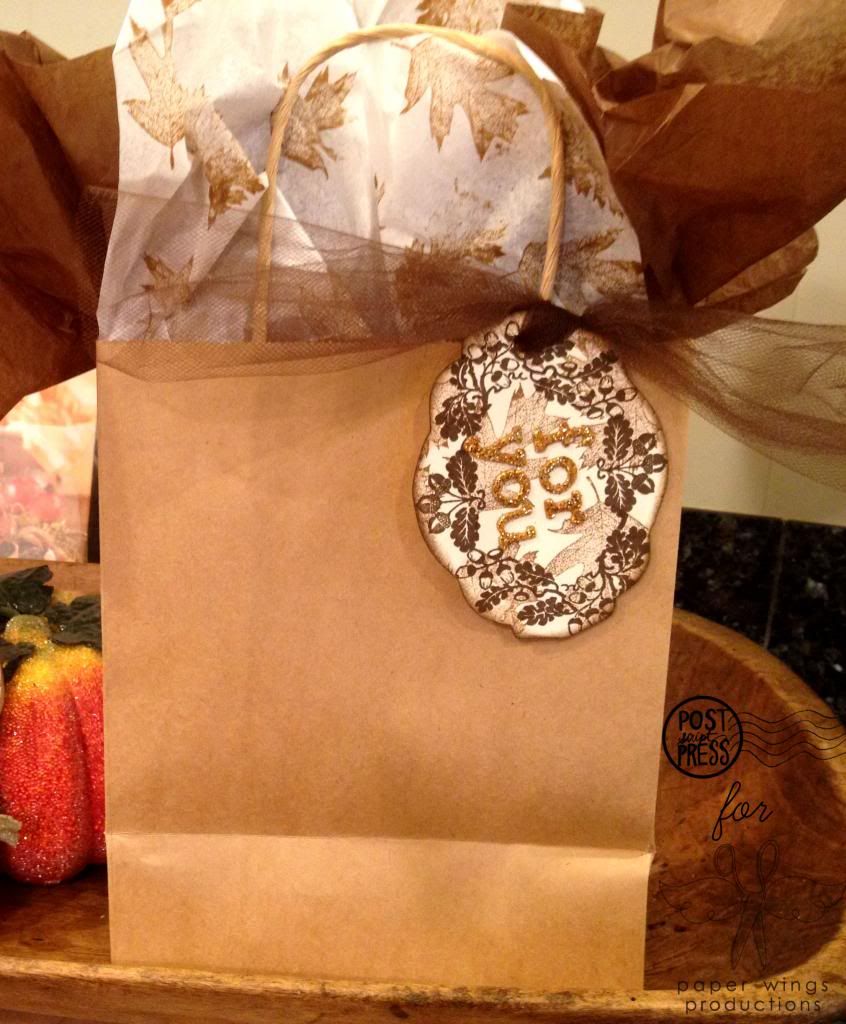
3. A tag for a gift bag that could hold a hostess gift.  I simply added "for you" in gold Thickers.  I also punched a hole and attached it to a kraft bag using some brown tulle (thanks Liz!).  I also stamped some really inexpensive white tissue paper with Distress Ink in brushed corduroy with the leaves from the Leaf or Leaves stamp sets.  It just adds that perfect touch.


Just imagine changing up the colors and images to make these items perfect for winter and/or Christmas!

And another look at all those labels put to use:


I hope this inspires you to pull out your Paper Wings Productions stamps and make something to celebrate autumn and the season of thanks.  We would love to see what you make with Paper Wings Productions stamps.  Add your projects to our flickr group, to Pinterest, comment with a link on this post or even email pictures to us!

Take flight,
Shay.

Supplies:

Ink: Tim Holtz Distress Ink in brushed corduroy and walnut stain
Cardstock: Neenah Paper in recycled 100 natural white
Other: Inksentials Ink Blending Tool by Ranger; Thickers by American Crafts; clothespin; kraft gift bag, brown tulle, hole punch, white and brown tissue paper; Glimmer Mist in gold; Mister Huey's by Studio Calico in gold
Related Posts Plugin for WordPress, Blogger...